I've become addicted to the crafting videos on Facebook these days. They are just fun to try, even though mine never quite turn out the same as theirs. It's ok, because I enjoy trying.
I've been inspired to try a variety of ways to decorate or upcycle used trays from flea markets or thrift stores. Above is a plastic Dollar Tree placemat. I found a galvanized tray at Haven Homes in TXK, painted it with acrylic, glued the truck from the placemat onto it, distressed with ink, gave it a twine border, and made a "messy bow" for it. I love that it matches our backsplash, so it's on display in our kitchen.
(SOLD)
Found another plastic placemat on sale at Hobby Lobby, trimmed it to fit another tray from Haven Homes. This tray was a faux leather -- pretty heavy duty -- and took the acrylic really well. I gave it a ribbon border, a messy bow, and distressed it with distress ink.
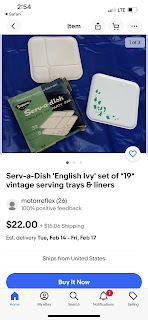
David spotted these metal trays at a flea market. They were in a bundle at a great price so we scored 19 of them. I could share with a crafty friend and still have plenty to play with.
They're almost a perfect square. Because they're metal, I probably won't add anything to the back to hang them with. I'm thinking easels.
This is the brand and it's obviously vintage.
The first one I tried is a napkin/modpodge job for Easter. I painted, decoupaged Dollar Tree napkin, made a craft stick church, and added a messy bow.
(SOLD)
I figured out really quick that modpodging on metal doesn't turn out as well as wood or glass for some reason. Lots of wrinkles. I added this ribbon border with hot glue. Don't think I like it as well, but it's glued on now.
I found some specialty paper at Hobby Lobby marked down to about 30 cents a sheet. Love Christmas gnomes. I decoupaged it on, trimmed with twine, made a messy bow. Then I found these wooden gnomes at Michael's for about 85 % off. They were the colors I needed. So I glued them on using hot glue as well as E6000. Laura has claimed this one.
Easter Bunny specialty paper in earthtone colors. I liked that idea for Easter. It's a little different. Acrylic paint with distress ink. Made the bow and stamped on "HOP" on one of the ribbons. Painted a wooden bunny, added a twine bow and button, glued on with the same glue mix as the gnome. Again, I used a twine border and framed the bunny with painted cardboard and ribbon.
(SOLD)
More Christmas gnome specialty paper. I used vintage white acrylic, added a messy bow, and glued on a framed Christmas goody that was 85% off at Michael's.
David ordered some Razorback napkins and asked me to make him a Razorback tray. I used white acrylic on this one. I don't like how splotchy the paint is and how the hogs bled as I modpodged them. I did a little distressing with black acrylic. He seems to like it. (But what can he say?)
(SOLD)
I tried another with chalk paint. I like the paint job better, and the positioning of the hogs is kinda fun (David's idea). But still a little too much bleeding. I may or may not add a border.
(SOLD)
I had one of Cranford and Kathey's napkins left in my stash. This is my fave Hog head. So I tried the chippy paint method with black acrylic, Elmer's glue, and white chalk. It's ok, but metal may not be the best bet for that technique. But it's a fun texture.
I still have a few more of these Serv-a-dish trays that I'll save for a Christmas scene.
Found a great wooden tray at Treasure Trove. They didn't come down on it as much as I wanted, so I decided to pass on it. But Alicia Willis and I worked out a trade: she got me the tray in return for a weathered bistro table and chair I have that she wants to re-do.
My first plan was to use this placemat Kathey gave me and decorate it for spring. But that deep red on the tray made me think of doing some chippy painting for a Christmas scene. So stay tuned for what I decide to do.


